Identifying the faucet type and symptoms is the first step. Gather the necessary tools and safety gear, and verify the shutoff is accessible with a bucket ready. The process proceeds through disassembly, inspection of stems or cartridges, and replacement of worn parts. Reassembly follows, then a careful test for leaks and tune-up to prevent future issues. Each action builds toward a reliable fix, but one detail can change the outcome, leaving the audience toward the next essential step.
Identify the Type of Faucet and Symptoms
To identify the faucet type and symptoms, start by observing the handle arrangement and water flow. The assessment notes leaky faucet behavior and associated symptoms, guiding diagnosis. Inspect for gasket wear and cartridge failure as common causes. Record observed symptoms precisely to distinguish between compression, ball, cartridge, and ceramic disk designs, enabling targeted, efficient repair planning.
Gather Tools and Safety Gear You’ll Need
Before beginning repairs, assemble a focused set of tools and safety gear to ensure efficiency and protect the installer. The procedure specifies a basin wrench, adjustable wrench, screwdriver set, pliers, flashlight, and a towel. Include safety gear: gloves, eye protection, and non-slip footwear. For faucet repair, verify supply shutoff is accessible; keep a bucket handy to catch drips. Maintain orderly, deliberate steps.
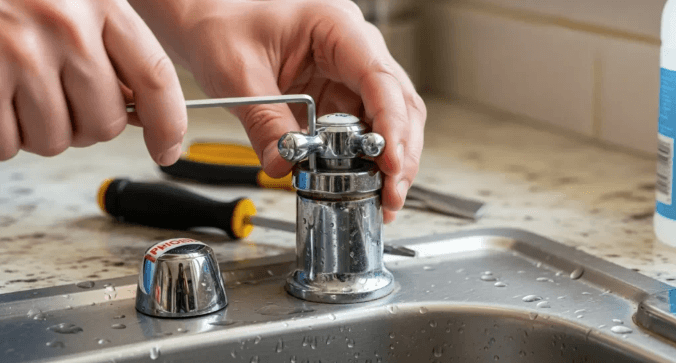
Step-By-Step Disassembly and Part Replacement
With tools at hand and safety gear in place, the disassembly can commence.
The procedure proceeds methodically: shutoff, relieve pressure, remove handles, and unscrew the bonnet or escutcheon.
Inspect stems, cartridges, and seals for wear.
Replace damaged parts with compatible units, reassemble in reverse order, and test for drips.
Discussion ideas emphasize faucet maintenance and proper component matching to prevent future leaks.
See also: The Evolution of Aerospace Technology
Test, Tune, and Prevent Future Leaks
Test, tune, and prevent future leaks by verifying restoration integrity after reassembly. After reassembly, the technician checks faucet color consistency, ensuring aesthetic alignment with fixtures. Water pressure is tested across cycles to confirm uniform flow, with no drips. Drain cleaning is confirmed clear, seals seated, and sealant selection verified for compatibility. Final inspection confirms leak-free operation and long-term reliability.
Conclusion
A final fix, firmly finished, follows a focused flow. From fearless, factual footing, flaws fade: foresight, forfeited friction, feasible foresight. For fast, faultless finishing, factual findings form framework: faucet types, faulty cartridges, worn valves. Careful carefulness creates confidence, capitalizing on clean, corralling checks. Concrete, concise steps culminate: shutoff secured, surfaces sealed, screws snug, seals substitutes, segments tested, seepage ceased. Sincere system safeguards sustain sound service, sparing sorrow, signaling success. Soundness stays steady, so surfaces stay sparkling, systems stay secure.